
So, we left off where the chimney breast had been repointed but still needed brick repairs, that has now been down, and a little more besides.
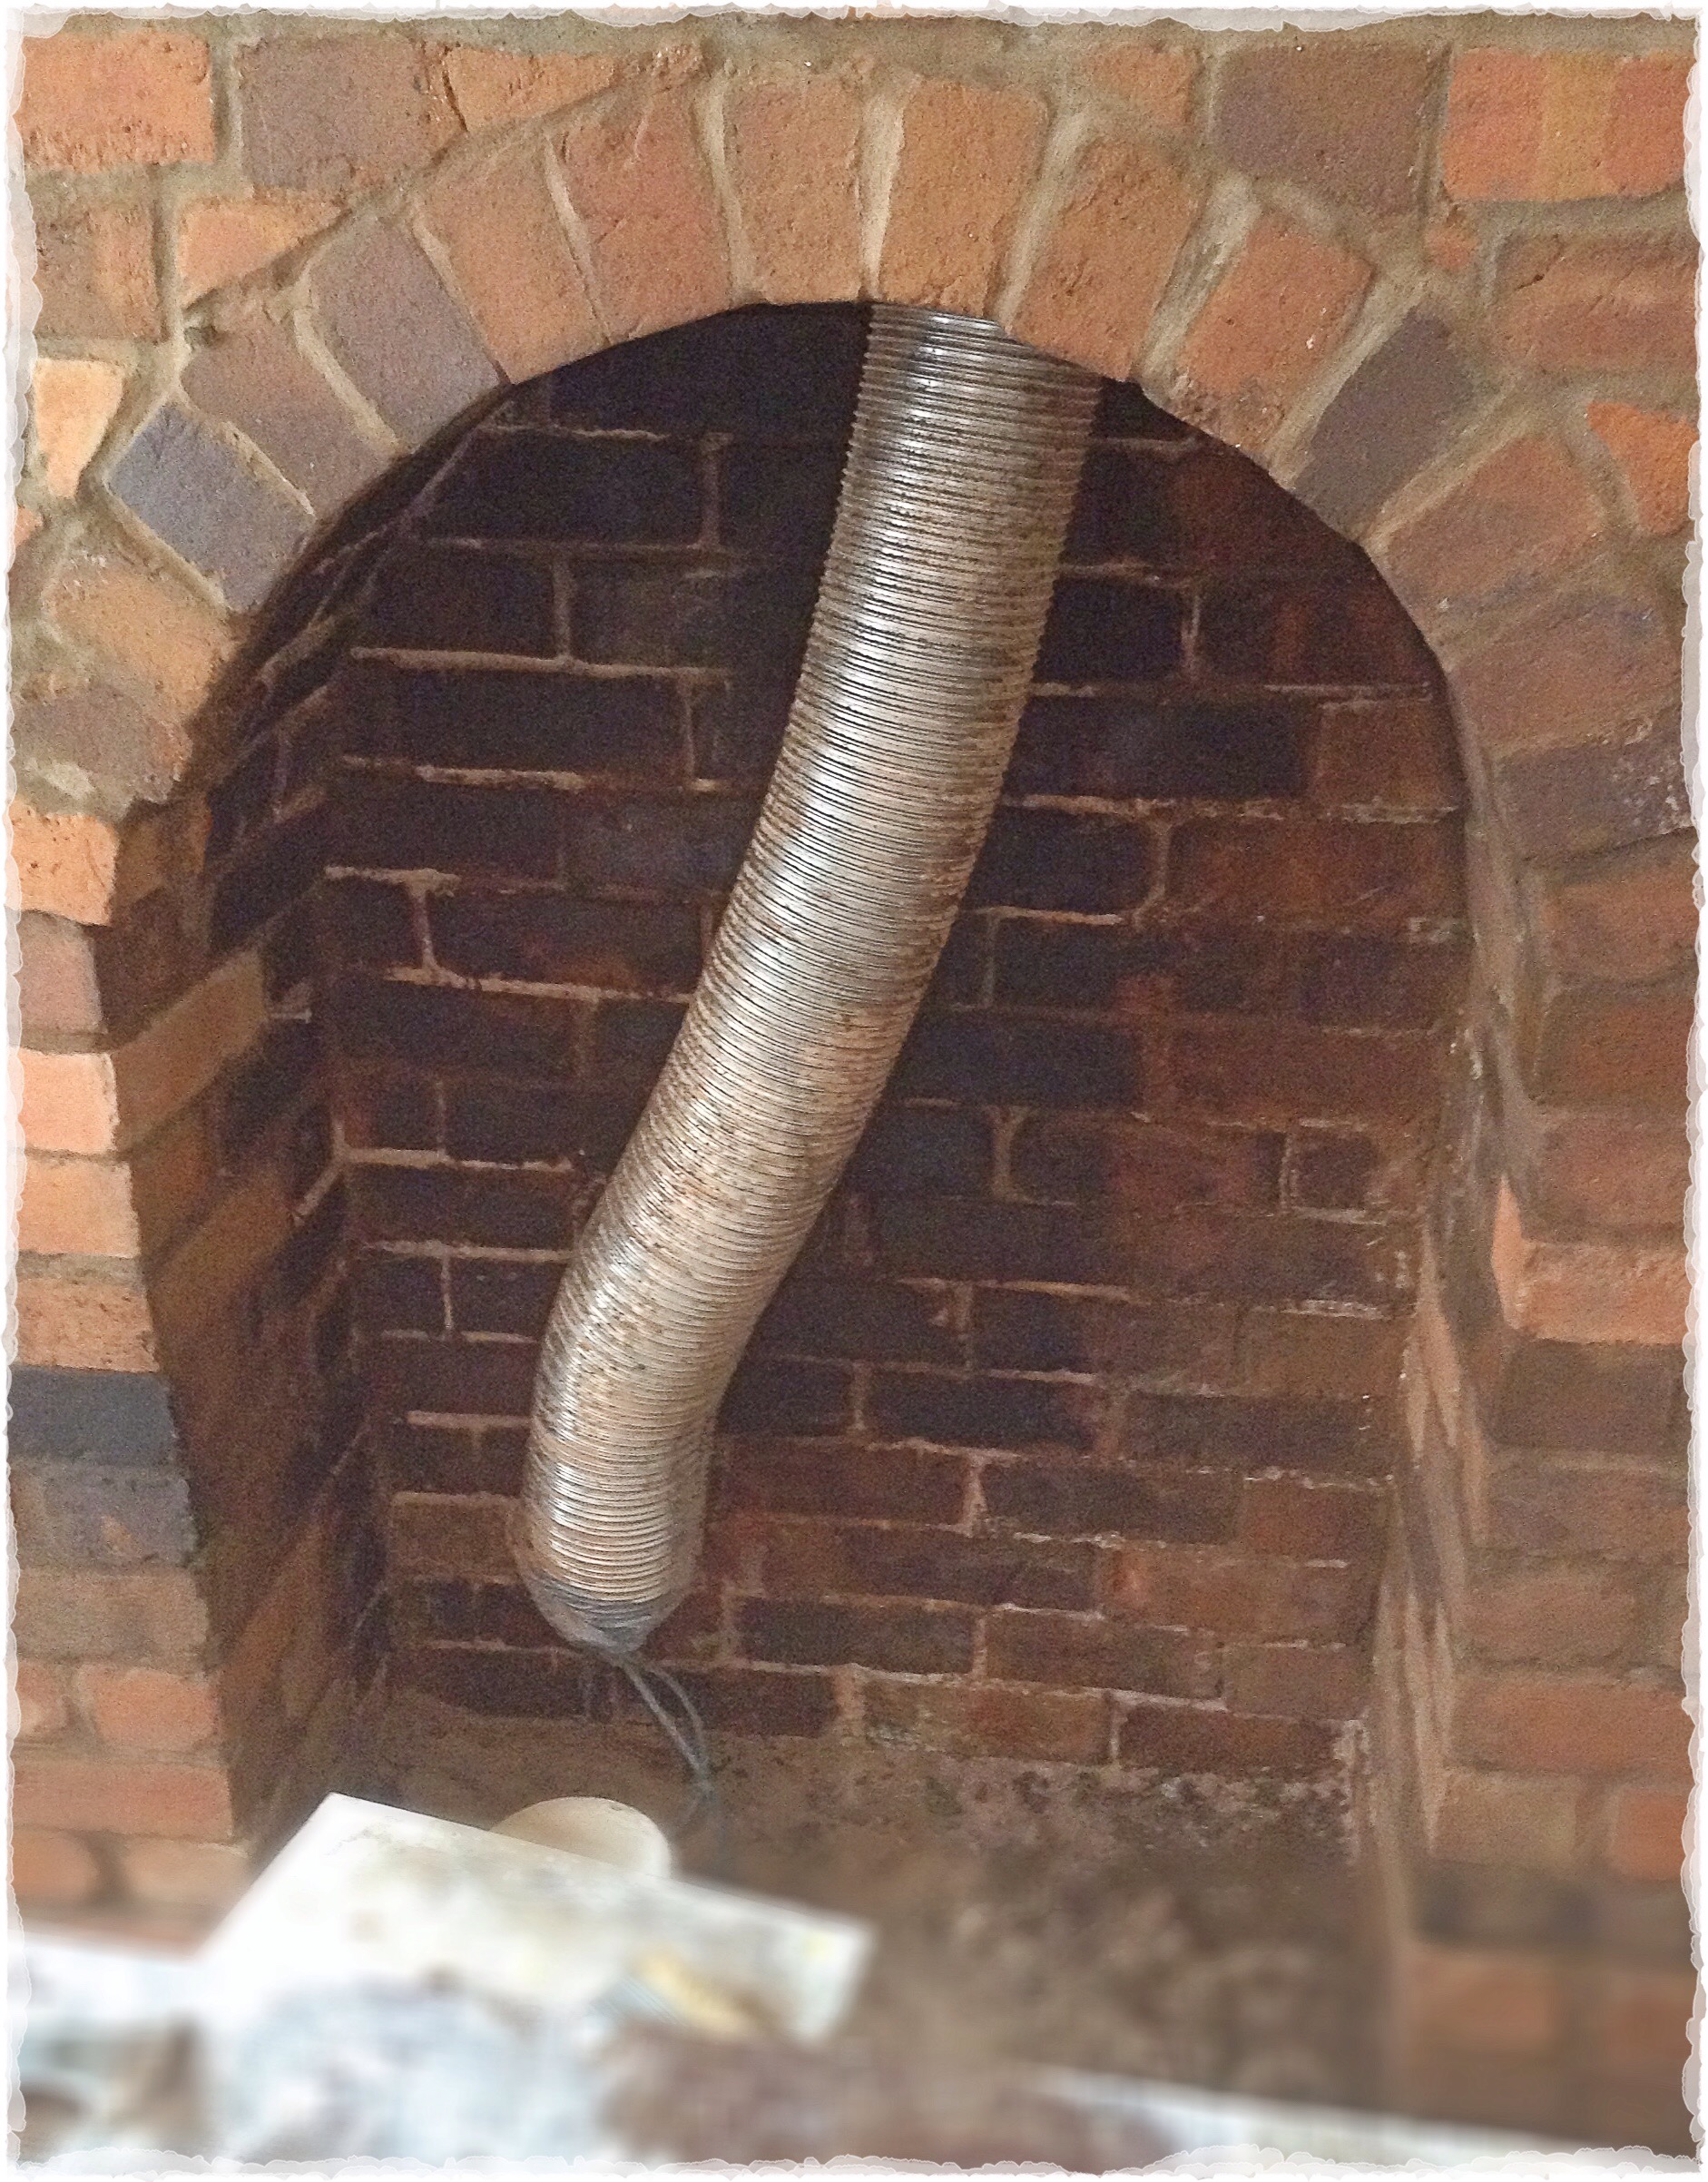
I was dubious, but the ever-thrifty Ronnie insisted on repairing the brickwork ourselves, off he went with his drill and a few hours later there was a uneasy looking gap in the arch.

We didn’t want new or even reclaimed bricks that would look incongruous with the original bricks, so wherever possible, we turned and reused bricks. A few more hours and a lot of mess later, we were done. I’m really pleased with the result. I like that that it doesn’t look too perfect, it still bears the scars of the fireplaces we ripped out, but they are just that…scars, rather than the big gaping wounds that were there before. A few hours with a bucket of brick acid got the bricks looking good, we finished them with some matt brick varnish.
The next job was to level off the floor so that we could lay the hearth bed. We built a frame from some timber which was loosely screwed into place.

We then filled the cavity with several buckets of cement and left it to settle, level and dry over a weekend.

I’d anticipated a brightly coloured tiled hearth, we got in loads of samples but none looked quite right with the brickwork, eventually we decided to use some left over stone from the kitchen floor.
Next was to have the walls plastered, the guy that did the rest of the house had gone to USA for a couple of months, so we used a locally recommended guy who did an adequate, but not great job as all the filler patching in the later pictures show!
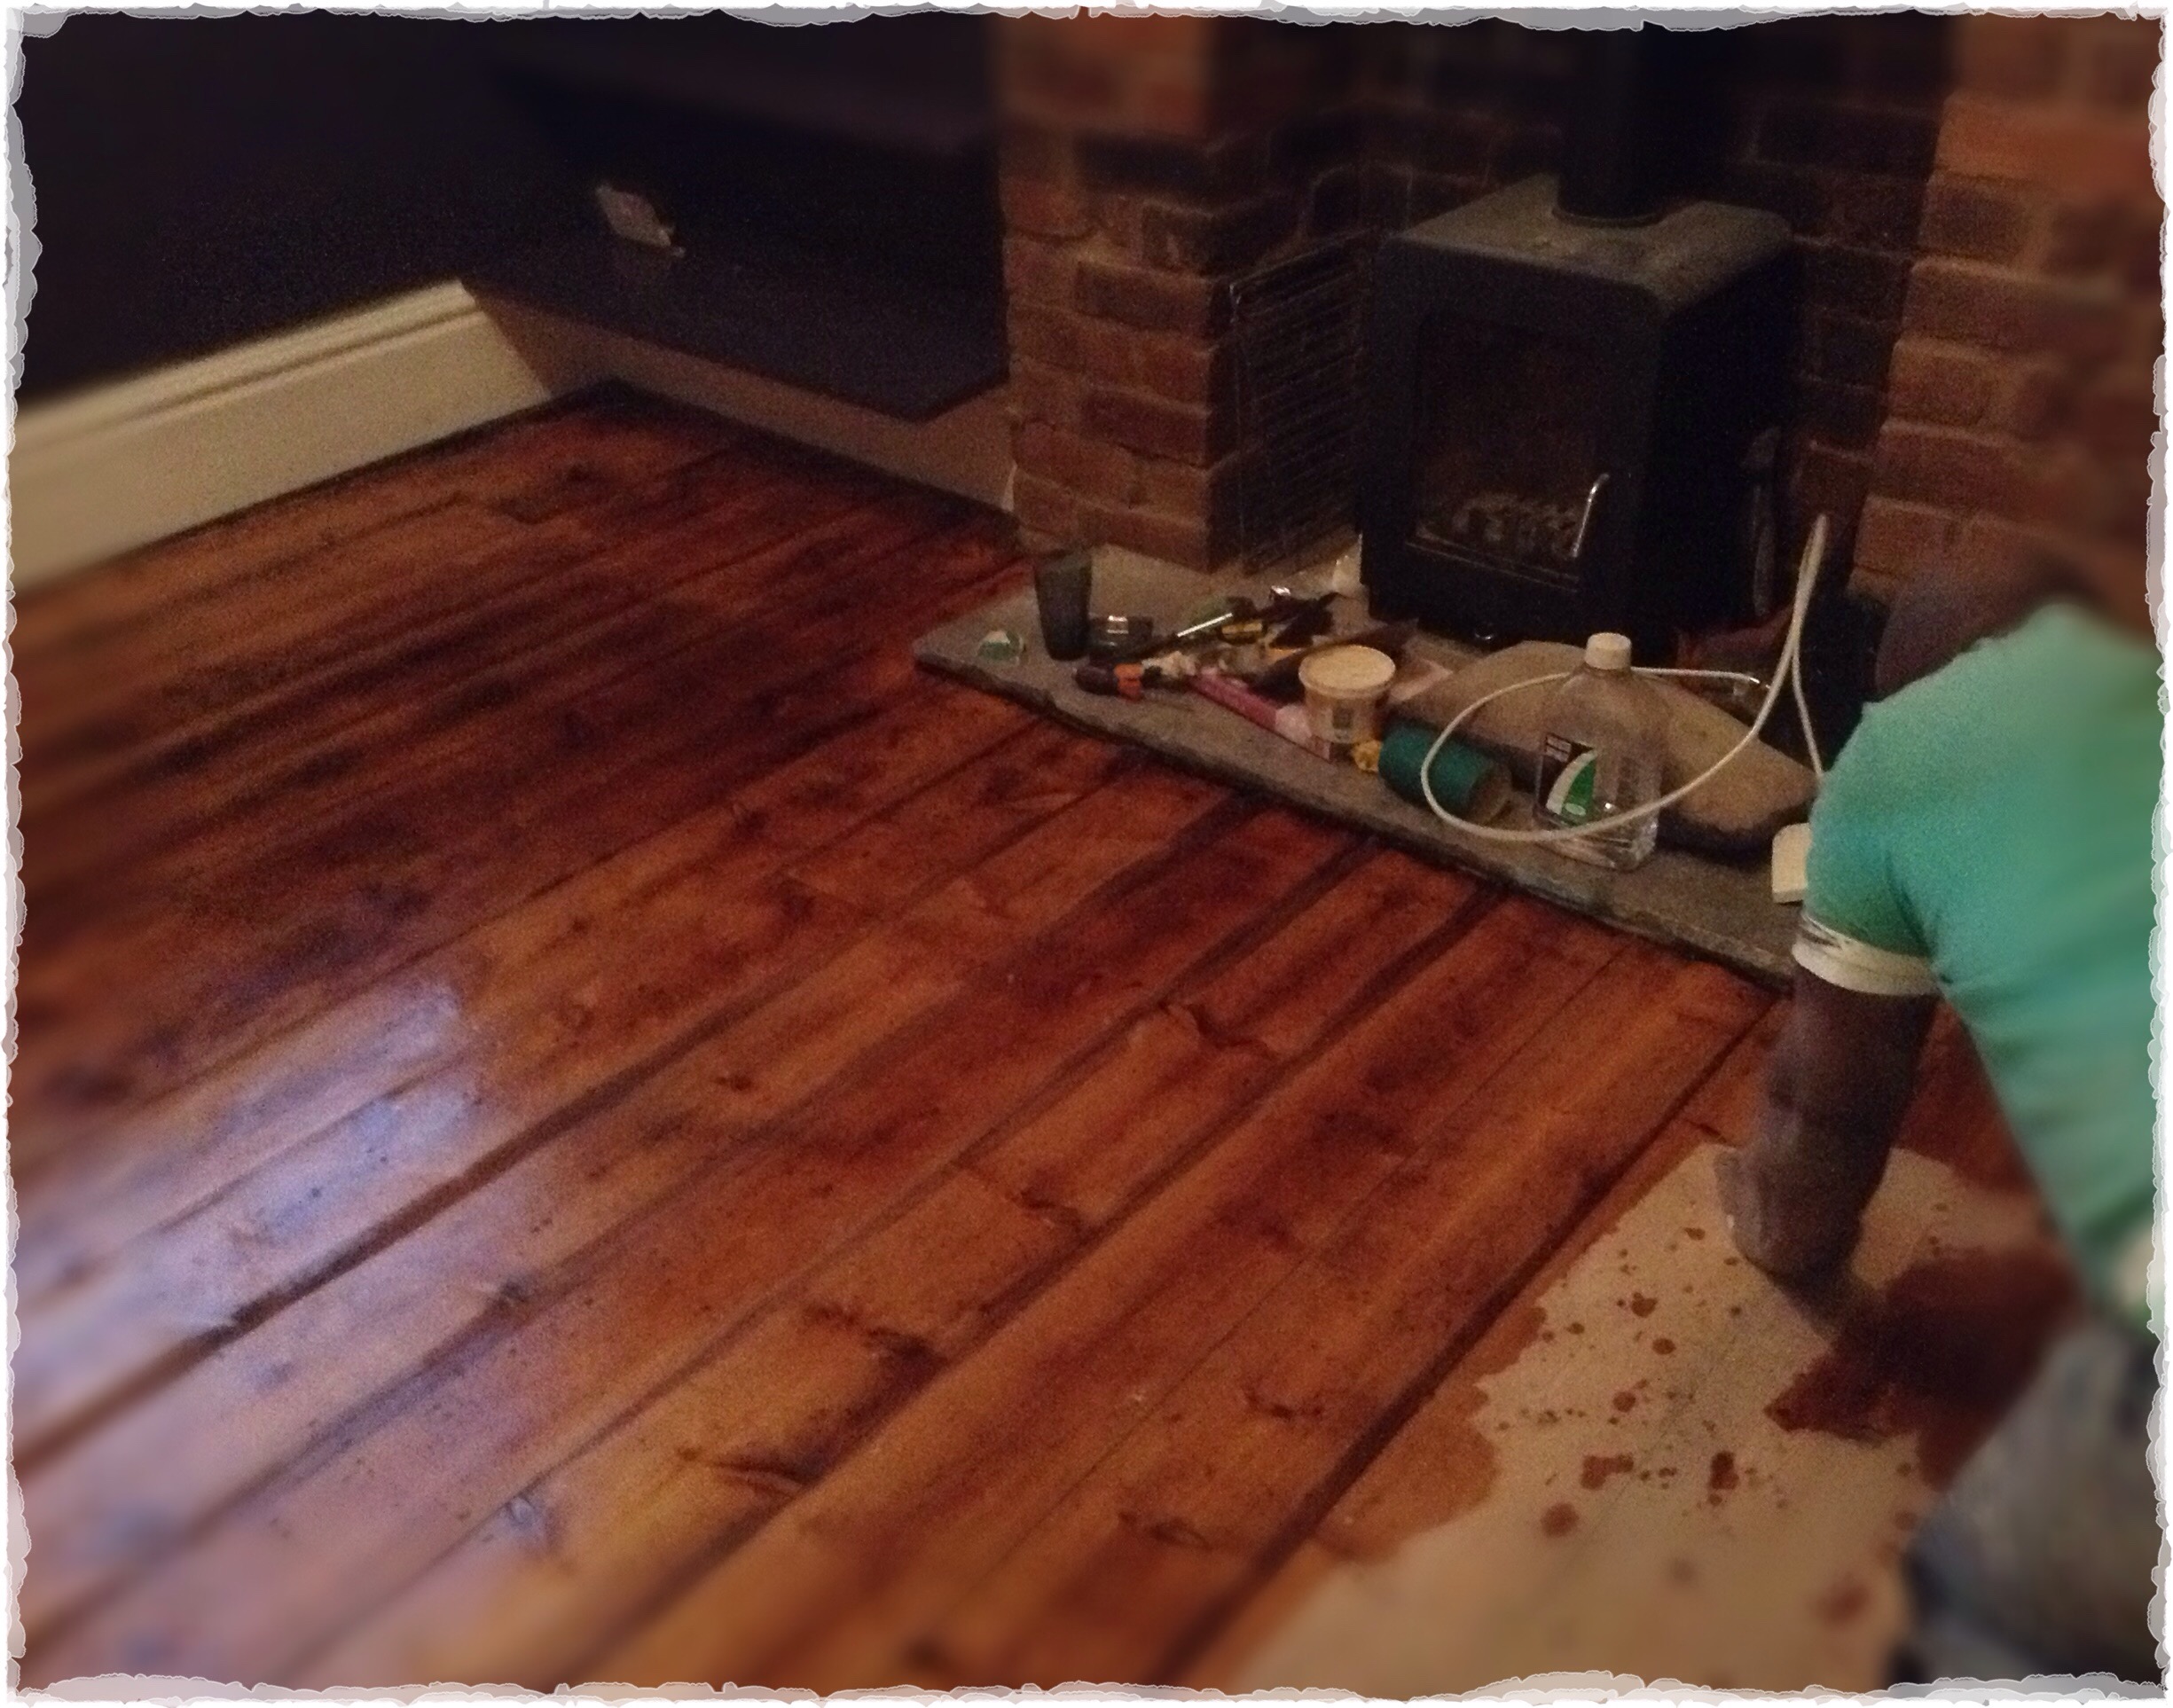
The floor was sanded and given 5 or 6 coats of varnish. We used clear varnish and the floor came up a lovely honey colour.
Paint was the next decision, I’ve been inspired by Abigail Aherns signature dark walls & as this is our second reception room we felt we could be a little braver with our depth of colour. Instead of the usual small fortune spent on tester pots we jumped straight in with a dark purple we had mixed. Big mistake. Once it was dry it just looked…well, cheap. So off I went to spend a small fortune on tester pots of more sophisticated colours, we eventually chose a tertiary purple. It’s taken a bit of getting used to, but we love it now.

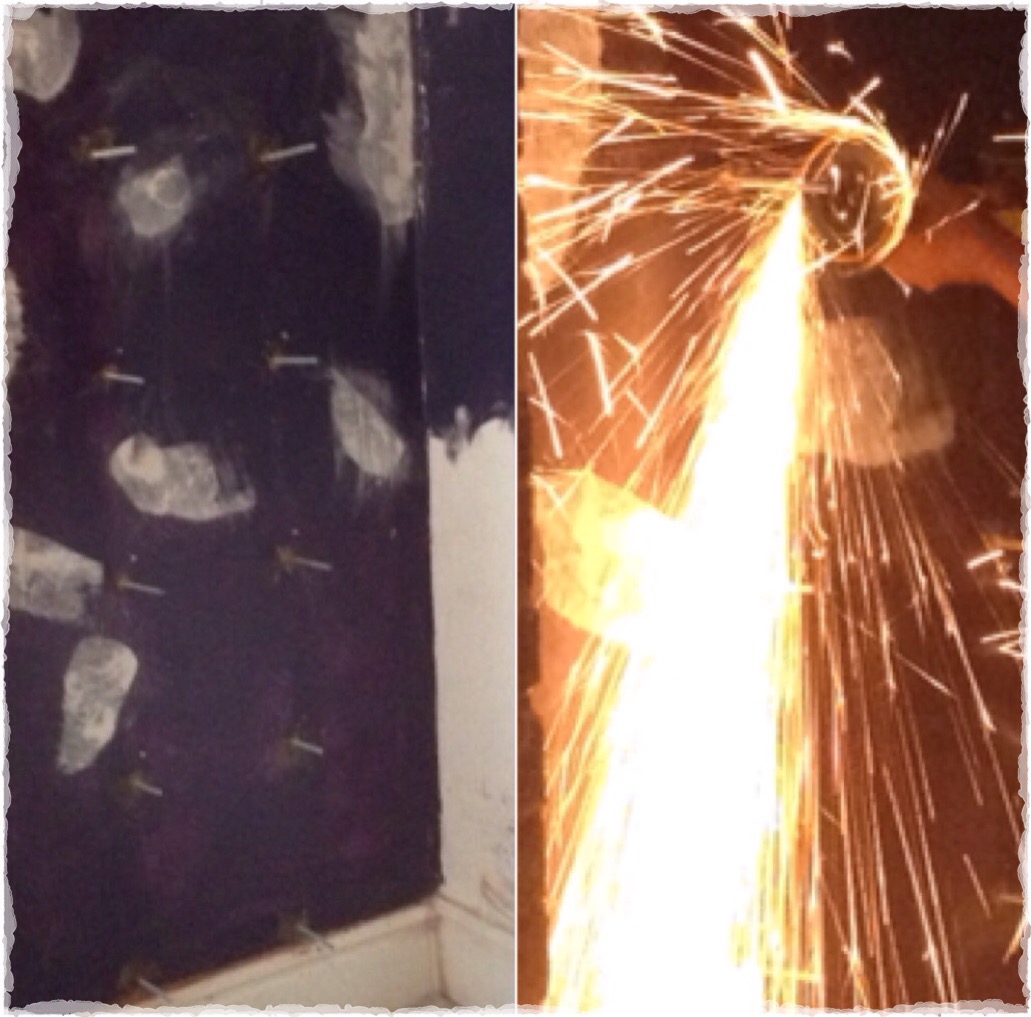
Last big job was to fit shelves into the alcoves. Ronnie did this by sinking steel rods into the wall and cutting them to length with the angle grinder, I left the house at that point!
We then cut the shelves to size and slid them onto the rods, secured with epoxy resin & painted them and we were pretty much there. You’ll see we’ve also had a log burner fitted. Next, dressing the room!

